If you read my post about Halloween costumes last week, this post might be surprising. (Or not, I don’t know. If it were me, I’d be surprised…but I’m not the boss.)
Over the weekend, I had one of my flurries of creativity and was suddenly determined to get my boys some seriously awesome costumes. (Am I the only one who is relatively flat-lined in the creativity department on most days but will with no warning fly into a hurricane-like rush of creative energy? Yes? No?) My husband was gone for a work thing on Saturday and we were in desperate need of getting out of the house, so off we went. I hoped to find full costumes at Once Upon A Child but my next option was to try and find the necessary items to put together the costume my 3 year old wanted. Our 19 month old doesn’t care yet, so I’ll admit, his costume was kind of an afterthought. (Sorry Spencer, when you’re old enough to have an opinion on costumes, I promise we’ll do what you want!)
All of the costumes in the store were for babies, so I had to quickly look through the racks to find what I needed for Miles’s costume. I’m being very careful not to specifically say what my son wanted to be…I don’t want a certain cartoon mouse’s attorneys to contact me about this post.
Items Purchased:
- 5 sheets (9 x 12) of black felt – On sale for $0.20 each = $1.00
- 1 (12 x 18) black foam sheet = $0.89
- 1 pair of white gloves (in a 2-pack) = $2.00
- 1 pair of red shorts = $2.50
- 1 black turtleneck = $1.50
- Heavy black tights = $2.99 (My most expensive item)
Items Used From Home:
- Heavy white scrapbooking paper
- Thin black headband
- Red turtleneck
- Black vest
- Blue pants
- Both pairs of shoes
- Sewing and “sewing” (ie., stapler) supplies
To make my son’s costume, I first used a simple whip stitch to sew three small strips of black felt onto each of the gloves. About halfway through I started thinking that perhaps a Sharpie would have been easier.
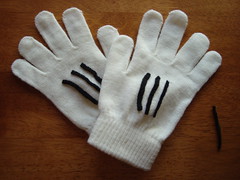
The gloves are really too big and I think I’m going to end up cutting off the fingertips. I don’t think he will tolerate wearing gloves and not having full use of his fingers.
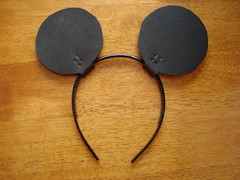
Next, I used a cup to trace a circle with a small extension and cut two of them out of the foam board.
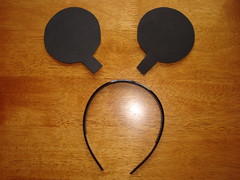
I then used my favorite crafting tool, a stapler (What??), to secure the ears to the headband. (Note: Miles does not like the feel of a headband. Good thing he’s a boy.)
Next, I used another simple stitch to sew the tail onto the back of the shorts.
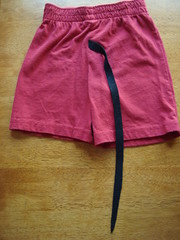
At this point, I was ready to make buttons for the shorts but didn’t have any large white buttons. I was tempted to go to the store and buy some, but I had already bragged on Facebook about my low total for the costumes, so I looked around and came up with some heavy scrapbook paper. I cut out circles and sewed them on.

And that was it! Here are all of the costume pieces:
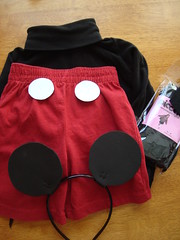
And here they are on my adorable little mouse!

I had one more piece to finish, however. My youngest son’s costume is a…well, it’s a dog, a dog who is friends with a mouse…
I cut some ears out of felt…

And then I used some green felty material from a pair of pants that I made for Miles when he was a baby (and the pants were made out of a blanket…if this isn’t upcycling, I don’t know what it is!). I cut the legs down the middle, cut down the seams, cut off the hems, and then had a big green rectangle. Then, with a few folds and staples (I’m something of a wizard with staples), we have…Spencer’s dog hat!
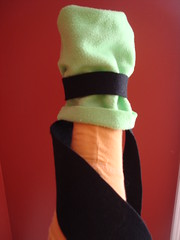
Unfortunately, he won’t let me get anywhere near him with this hat. He won’t put it on, he won’t touch it, he wants nothing to do with it. And the rest of his costume doesn’t make sense without the hat (it’s just a shirt, a vest, and pants). But oh well. I did my best.
So there we have it! The whole putting together of these costumes took maybe an hour and a half, which I found during naptime. It was so easy, and I’m really glad I went for it. I looked at so many expensive costumes and just couldn’t handle the idea of paying that much for costumes!
Grand Total for this year’s costumes? $12.41!
*Edited To Add…* I ended up having to change Spencer’s costume again because he wouldn’t wear the hat! I decided to make him a Toodles shirt to continue with our Mickey Mouse Clubhouse theme. I won’t give a full tutorial, but I made it from felt (which we painted) and used Heat N Bond to attach it to the shirt!


These are great costumes! They look authentic and are age appropriate! And I bet that they cost far less than buying it pre-made.